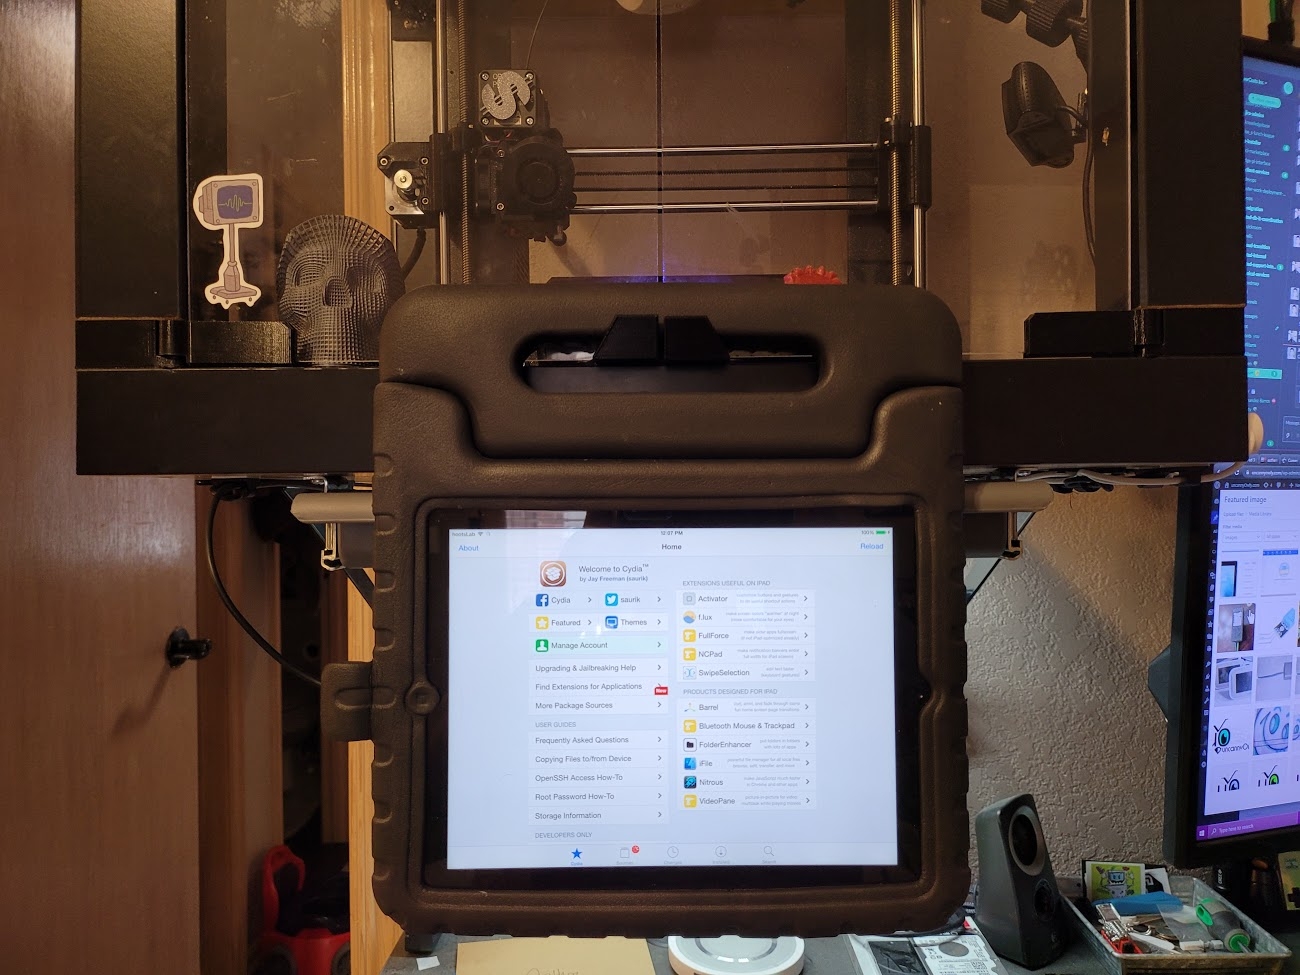
iPad 3 (GSM) OctoPrint Display
Jailbreaking an old, outdated, non-supported iPad from 2012ish, nearly a decade later has turned out to be a complete pain in the butt. Continue reading to find out how to do this as of May 2021, using a Windows 10 device.
First quest in this journey, read this document in its entirety. As of posting this, finding the right process and files was a major headache. Additionally, so much time has passed since the original processes, you’re going to find a TON of conflicting information on which tools to use and what process to follow. Thankfully, this article is going to attempt in demystifying this process. I’m going to try and consolidate this information down and provide direct links back to the sources so you can read them as well. Hopefully this won’t be as painful for you, god speed. So, without further ado, let’s start at square 1 and go from there..
Restoring the iPad to factory:
First step to bring this dogturd back to life, we need to figure out what version of iOS you are currently running. If it 9.3.5 or 9.3.6, you’re going to want to keep reading. If you are a lucky bastard who still has the 8.4.1, never upgraded, you can skip a lot of this read and just go down to the 8.4.1 section.
So as mentioned, if you are on 9.3.X, go ahead restore it back to factory image. I used a tool called 3uTools and it was a life saver. This let me reload the firmware without the dreaded itunes, lets me skip activation and setup as well. Takes about 10-15 minutes to complete this step.

9.3.X Jailbreak:
Once that’s all finished up, let’s proceed to jailbreak this sucker. You should notice that the device is online and connected in 3U, click the “Jailbreak” side tab and then “Run Jailbreak” button in the bottom right. This process is pretty well documented in 3U tools, just read what it tells you to do as far as “Trusting” the cert etc. The whole process takes about 5 minutes to complete, not really that bad. During this process my WIndows10 “Defender Antivirus” was prompting me that “known exploits” were being downloaded. I was able to whitelist each file the 3U was downloading, but it took a few tries to catch them before Windows ate it up. Once you have all the whitelisting done, Jailbreaking will work. This is same story for the 8.4.1 process, be warned. Also to note, you may have to “jailbreak” using the phoenix app a few times. It took me anywhere from 1 to 3 attempts to get it to work. After it reboots, just see if you have the Cydia app on your springboard. If not, repeat until you do. Again, it may take a few attempts for whatever reason.
Once we have Cydia on there, go ahead and open it up and wait a few moment. It should prompt you to update components, choose “COMPLETE UPGRADE”… and wait another 5-10 minutes while it does its thing. It should either crash out or prompt you to respawn. Eitherway, do it and reload Cydia. Once we have it online and working with the repos, choose the “Search” in the bottom right corner. From the spotlight bar, find “Filza File Manager” and install it. Give this 5 minutes or so, it’ll say “Return to Cydia” when done. You can now hit the HOME button and launch Filza.Filza is a file manager that is going to allow for us to modify a system file to trick iOS in to taking an OTA upgrade. We want to choose “Root” on the left side in Filza, navigate to: Root:/System/Library/CoreServices and then scroll down til you find “SystemVersion.plist”. Long press on this file and it will open a menu on the left to “Open With…” and choose Text Editor. Now, this is the most important part. If you mess this up and put in wrong values, you can boot loop or potentially be stuck in a non-jailbroken state until you restore.
In the file you have open, find “ProductBuildVersion” and change it’s value to the corresponding 6.0 release value: 10A403In the “ProductVersion” field, place the value: 6.0
Now save this file. The “save” button greys out once done. Now click “Cancel” and “Done” to exit that file. You can single click on the file to verify your changes. Now is the part that requires butthole puckering. Reboot.
As its rebooting you should see an Apple logo progress screen as its coming up. If you are still connected to 3U tools, it should also be reporting back the build changes you just made:

Once the system is online, you’ll want to open the Settings –> Updates and check for an OTA update. It should prompt you to install 8.4.1 at this time. Do it, this takes about an hour on the long end depending on multiple variables. Just let it ride and come back later.
After you return to your iPad post update, you will now need to perform a factory reset. Just reset it all, remove all user data and settings. You want a complete factory restoration to get all the associated wallpapers and tools put back in place post downgrade.
8.4.1 Jailbreak:
After the reset is complete, depending if you used 3uTools or not, activate etc. and bring the iPad back online. At this point, plug it back in to your PC running 3uTools and perform the jailbreak for 8.4. Follow onscreen instructions again, it may take more than a single attempt, similar to Phoenix. After this, you are now jailbroken and rocking. Perform the same steps above with Cydia- launch, let it try to update (its going to have problems cause of a dead repo) but eventually will prompt you to install updates. Do a complete upgrade. I also recommend installing “mTerminal” and “APT 0.7 STRICT” as we will be doing some manual updates later in this tutorial. You need the APT package to get it working in mTerminal properly, otherwise you’ll get “Command not found” when doing the apt-get update. Additionally, go ahead and add a the following repo: “cydia.invoxiplaygames.uk”. From there, crack it open and find the app “Checkmate Store!”. This will allow you to get past that pesky “non compatible” message for some apps.
Fix YouTube for iOS 8.4.1: “Update Required” pop-up
To fix YouTube, you first need to install the last compatible version that was available. You can sideload the ipa or get it from iTunes. Just follow the prompts in iTunes to get the last known working version. After installed, you now need to open Cydia and install “iFile” application. Once iFile is on, open it up. Click the “Applications” in the left side. You should be presented with a shortlist of GUIDs for the apps on the right. On my ipad the GUID started with D7488361. If yours are different, just open each GUID folder and see what is inside. It should be very obvious which “app” you are viewing. Once you found Youtube, there should be a folder named “Youtube.app” you will want to click on. That opens a file list, scroll down until you find the file “Info.plist”. Press on the Info.plist file to expose “Text Viewer” popup and select that option. Once this editor opens, hit the “Edit” button in the top left. Now find the following strings and modify their existing values: [CFBundleShortVersionString] and [CFBundleVersion]. You want to change these to “14.10”, no quotes. Click “SAVE” and “DONE” to close. Now respring YouTube (and sign in if you want). It should be working now without issue.
8.4.1 Repository Fixes and Adds:
Next thing is to download toolsets etc. A lot of REPOs are dead in Cydia in 2021. First off, use iFile or Filza to navigate to ROOT/etc/apt/sources.list.d and remove the tihmstar.net repo. I am not 100% sure that’s the location, but it is somewhere in the /apt/ folder. This is the repo that is dead and causing the updates to hang up / timeout. After you have this removed go ahead and pop in to mTerminal and run that “apt-get update” we mentioned earlier in this tutorial. Just let it run, it’ll reload some stuff. If you had Cydia open, swipe closed and re-open. Now let’s get some “good and relevant” repos put in.
Now open Safari and and go over to ios-repo-updates.com. At the bottom is a “Repositories” tab, select that and then sort by “Most Popular”. Add whatever repo you wish or none at all, whatever this is your bag. I additionally added one that is somewhat “sketchy” but enabled me to download and install some tools that are no longer available to purchase in Cydia (as of Dec 2020.). If you wish to do this, lest ye be warned- there be dragons ahead. The sketchy repo I found was “http://cydia.vn”. From there I was able to get Flex2, Nitrous, iFileCleaner Pro (for daemon disabling per Reddit Legacy Jailbreak thread found here). I later then added another “proper” repo to update iFileCleaner to the latest iteration, uncracked and legit (and purchased cause help the dev!).
Some final tips for you or suggestions I have for you are to do some minor visual tweaks. I added a package that let me rename my “carrier text” since my iPad is a GSM model and wanted something other than “NO SIM” in the top left. I also added the “Remove SIM Nag” tweak to keep it from telling I don’t have a sim card in it after every reboot. I added in Winterboard for theming and then tacked on Material for iOS to make it look somewhat modern. I added OpenSSH Daemon to it, configured to start up and use password auth. I am planning on setting up keyauth for it in the future to integrate in to my HomeAssistant instance. The end goal for this tablet is to be a OctoPrint monitoring station that doubles as a clutch toddler entertainment center. I also added a NOAA weather monitor app that still works, just put this thing behind a piHole to block those old ass ads.
At this point, you should be rolling and ready to do whatever you wish with your restored and refurbished iPad. Enjoy.
References/Sources:
- Reddit LegacyJailBreak MegaDump Sticky
- Reddit LegacyJailBreak Performance for 8.4.1
- Reddit: LegacyJailBreak Fix Youtube PopUp
- Reddit: Downgrade from iOS 9.3.X
- Firmwares: IPSW.ME
- More Firmwares: iphonehacks.com
- How to restore unsigned firmware (unused in this tutorial)
- Vieux – MACOS Restore unsigned firmware tool. (unused in this tutorial)
- Downgrade Tutorial with Vieux (irrelevant for Windows, but w/ Reddit knowledge above it was helpful)
- 3uTools – iTunes Replacement for legacy devices.